HMIS - Hospital Management and Information Services
Benefits of the Web Application
- Single interface to view Total Beds and Vacant Beds for all Hospitals under the purview of the State Health Department or Municipal Corporation.
- Entire report can be seen in a Visual Tree Format or Tabular Format.
- Drill down into each Hospital to see Ward and Floor wise information of Vacant Beds.

Hospital Tree View Drill Down
- Each Hospital represented in a clear visual tree format.
- Details available for each Ward within each Hospital including the Block Code and the Floor Number.
- Details for all the Beds within each Ward, clearly identifying each Bed with its unique code.
- For each Bed, indicates if it is Occupied or Vacant.
- For Occupied Bed, gives the details of the Patient i.e the name.
- Clearly indicates if the Bed has a Nidan™ contactless device present on it.
- Additional drop-down menus available to see the in-depth Hospital Profile, Ward Profile and Patient Profile.
- Depending on the privilege, the Logged-in user can view all hospitals under their purview or can view only a single hospital.

Hospital Tabular Bed Occupancy View
- The Tabular Bed Occupancy View gives an overall count-wise detail of all the Hospitals under the purview of the State Health Department or Municipal Corporation.
- Each Hospital can be seen with the Total Beds, Vacant Beds, Occupied Beds, Vacant ICU Beds, Vacant Non-ICU Beds, Total ICU Beds and Total Non-ICU Beds count along with Hospital Phone No. and Hospital ID.
- By clicking on each Hospital, we can view the detailed Bed Information of each vacant bed in that Hospital including the Block, Floor and Ward details of that bed.
- Depending on the privilege, the Logged-in user can view all hospitals under their purview or can view only a single hospital.


Ward Info Entry Interface for Individual Hospitals
- Individual Hospital facility management staff can view and edit the details of all the Wards in its Hospital.
- If required, the Municipal Corporation can have a read only view of all the Wards in the Hospital.
- Individual Hospital facility management staff can enter information for new Wards whenever required. (Plan to provide scripts to bulk upload information of all the wards in a Hospital at one go).


Wardroom Type Info Entry Interface for Hospitals
- Individual Hospital facility management staff can View and Add all Wardroom Types.
- User who have read only view can not see ‘Wardroom Types’ submenu inside Wardroom Menu.
- Individual Hospital facility management staff can enter information for new Wardroom Types whenever required. (Plan to provide scripts to bulk upload information of all the Wardroom Types available for Hospital at one go).


Bed Info Entry Interface for Individual Hospitals
- Individual Hospital facility management staff can view and edit the details of each Bed in its Hospital.
- If required, the Municipal Corporation can have a read only view of all the Beds in the Hospital.
- Individual Hospital facility management staff can enter information for new Beds whenever required. (Plan to provide scripts to bulk upload information of all the beds in a Hospital at one go).


Doctor Info Entry Interface for Individual Hospitals
- Individual Hospital management staff can view and edit the details of each Doctor in its Hospital. Note that a particular Doctor information is available across multiple Hospitals as a Doctor can visit more than one Hospital.
- If required, the Municipal Corporation can have a read only view of all the Doctors in all Hospitals.
- Individual Hospital management staff can enter information for new Doctors whenever required. (Plan to provide scripts to bulk upload information of all the Doctors in a Hospital at one go).


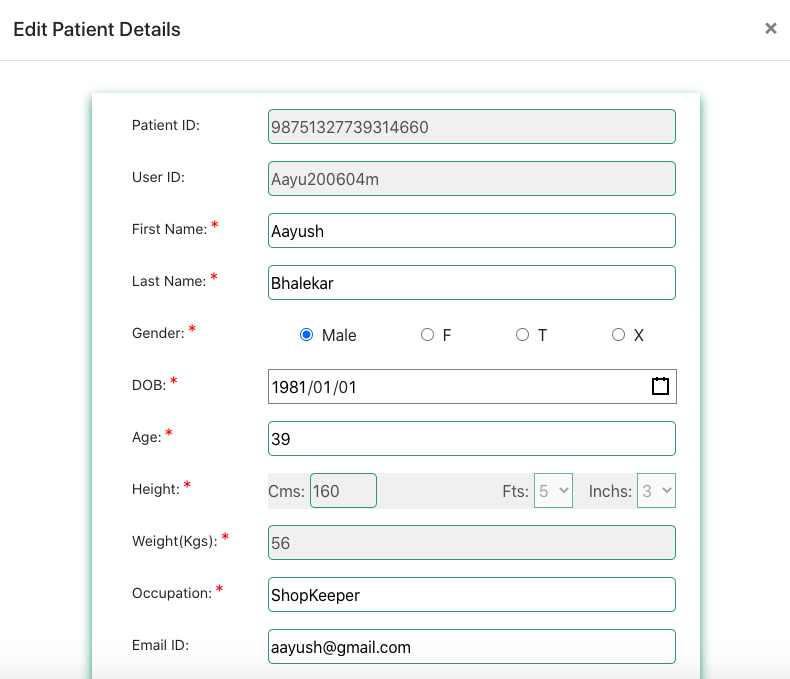
Patient View Interface for Individual Hospitals
- Individual Hospital Reception or Patient Admission/Release staff can view and edit the details of each Patient in its Hospital. Note that a particular Patient information is available across multiple Hospitals as a Patient can visit more than one Hospital.
- On clicking Search button, it shows the details of all patients. We can search a patient by entering any of the field like PatientID, Patient UserID, Name, Email id or Phone No.
- On clicking show button they can open screen to download all Medical report files of selected Patient.
- If required, the Municipal Corporation can have a read only view of all the Patients in all Hospitals.
- Individual Hospital staff can create a new patient only during the Admission or OPD process. They can only edit the details if needed from this interface.

Patient Admission Interface for Individual Hospitals
- Individual Hospital Reception or Patient Admission/Release staff can Admit a Patient using this interface. Note that a Patient is available across multiple Hospitals. This interface will not be available for Municipal Corporation.
- For Admission, the staff has to select existing Patient (or create a new Patient). Then they have to select the Doctor and the Bed for the patient. The interface ensures that an already allocated Bed is not shown for selection. Then they have to select add/change Health Details. (Note that before selecting add/change health details, patient must be selected). The Patient can be either Admitted or marked as OPD.
- Once Admitted, the Patient and the Bed are not available for admission till the Patient is Released from the Hospital. Also in the Bed Occupancy screen shown earlier, the Vacant Bed Count is automatically decremented.
- Note that in case of OPD, the Patient and the Bed are still available for Admission, as OPD is considered as a temporary condition.

Patient Release/Discharge Interface for Individual Hospitals
- Individual Hospital Reception or Patient Admission/Release staff can Release or Discharge a Patient using this interface. This interface will not be available for Municipal Corporation.
- For Release, the staff has to select an Admitted Patient (after searching). After selection, they have to confirm the details of the Patient, the Doctor & Bed that were assigned during admission. Also, here we have to mention the Diagnosis details of the admitted patient through the Final Diagnosis Details screen. Once they are OK with the detail, they can click on ‘Discharge Patient’ button.
- Once released, the Patient and the Bed are available for admission again in the Hospital. Also in the Bed Occupancy screen shown earlier, the Vacant Bed Count is automatically incremented.
- Note that an OPD entry is not considered for Release. The patient and bed in that case are available by default.

Nidan™ Device Touchless Data
- On the left hand side tree, select the Bed which has a Nidan™ Touchless Device attached to it and has a Patient.
- On selecting the Bed, the most recent measured information is visible on the right hand side.
- It shows Body Temperature, Nasal Congestion, Respiration Rate, Oxygen Level and Heart Rate which have been measured in a touchless manner.
- The out of range, Abnormal values (in Red) are shown first. These are followed by values which are in the Borderline range (in Orange) and then Normal range (in Green).

Device Touchless Data Charts
- On the left hand side tree, select the Bed which has a Nidan™ Touchless Device attached to it and has a Patient.
- On selecting the Bed, the historical information of the Patient is visible on the right-hand side.
- The vital measured parameters are shown in a drop-down from where the user can select a particular measured parameter to view historical data. The user can view patient historical data by selecting a particular Period from a second dropdown which includes Hourly, Daily, Weekly and Monthly selection. Also, if a user wants to view historical data within a particular Date range, then the user can select a date range by enabling option ‘Select different Period to View’.
- All the previous visits of the selected patient are shown in a drop-down menu if applicable from where he/she can view the historical visit data of the selected patient.

Admitted Patient View Interface for Individual Hospitals
- Individual Hospital Reception or Patient Admission/Release staff can view and edit the details of each Admitted Patient in their Hospital. Note that if the logged in user has access to more than one hospital, then he has to select a particular hospital first for which he wishes to view details of Admitted Patients.
- If required, the Municipal Corporation can have a read only view of all the Admitted Patients details in all Hospitals.
- By clicking ‘Download’ button, individual Hospital staff can download a CSV File of all Admitted patient information in selected Hospital.


Patient Health Details
- In admission screen, after clicking on ‘Add Health Details’, staff have to select provisional diagnosis. Also through add other conditions, staff can add multiple diseases from dropdown (one can type a new disease if not available).
- During Patient Release, the user has to mention the Primary diagnosis and other additional conditions if present for an admitted patient through the Final Diagnosis details screen. Here, the user can choose the diagnosis name from the drop-down list, or else he can enter a new Diagnosis name too.
- We can also add medical report files for that patient while admitting a patient or releasing a patient from hospital and we can also see all previously uploaded medical report files.


Patient Medical Reports Download Interface
- Individual Hospital Reception or Patient Admission/Release staff can Download Medical Reports using this interface.
- Once they click on download icon of particular file, that file will download in their Desktop or Laptop and they can open it from any suitable application for that file available in their system.

Patient Movement Interface For Individual Hospitals
- Individual Hospital Reception or Patient Admission/Release staff can Move a Patient using this interface. This interface will not be available for Municipal Corporation.
- For Movement, the staff has to select an Admitted Patient (after searching). After selection, they have to select a vacant bed using ‘Destination Bed Selection’ button on which they want to move the patient. Once they are OK with the detail, they can click on ‘Move Patient’ button.
- Once moved, the previous bed of patient will get vacant and the new bed will get occupied.
- Note that an OPD entry is not considered for Patient Movement.

Patient Turnover Interface For Individual Hospital
- Individual Hospital Reception or Patient Admission/Release staff can view ‘Datewise Patient Turnover’ using this interface. This interface will also be available for Municipal Corporation.
- For Datewise Patient Turnover, the staff has to select Hospital Name. After selection, they have to select time period for which they want to view Patient Turnover. Once they are OK with the detail, they can click on ‘View’ (‘Refresh’) or ‘Download’ button.
- On clicking ‘View’ (‘Refresh’) Button, it shows ‘Admitted Patients’, ‘Released Patients’ and ‘OPD Patients’ details for the selected time period.
- On clicking ‘Download’ Button, it downloads the count of ‘Admitted Patients’, ‘Released Patients’ and ‘OPD Patients’ details in CSV file for the selected time period.

Admitted, Released and OPD Patients in Datewise Patient Turnover
- In Datewise Patient Turnover, we can click on cells of the table.
- On clicking a cell in ‘Admitted Patients’ column, it opens a new window which shows details of Admitted Patients for that date.
- On clicking a cell in ‘Released Patients’ column, it opens a new window which shows details of Released Patients for that date.
- On clicking a cell in ‘OPD Patients’ column, it opens a new window which shows details of OPD Patients for that date.
- All these details can be downloaded in a CSV file by clicking ‘Download’ button.


Previous
Next
Hospital Profile
- Hospitals are represented in a Visual Tree Format.
- On clicking the drop-down icon on right side of Hospital Name, it shows ‘Hospital Profile’ button.
- On clicking ‘Hospital Profile’ Button, it shows Hospital Profile in a new window.
- Hospital Profile contains all the details regarding the Hospital.


Ward Profile
- Wards are represented in a Visual Tree Format.
- On clicking the drop-down icon on right side of Ward Name, it shows ‘Ward Profile’ button.
- On clicking ‘Ward Profile’ Button, it shows Ward Profile in a new window.
- Ward Profile contains all the details regarding the Ward.


Patient Profile
- Patients are represented in a Visual Tree Format.
- On clicking the drop-down icon on the right side of Patient Name, it shows ‘Patient Profile’ button.
- On clicking ‘Patient Profile’ Button, it shows Patient Profile in a new window.
- Patient Profile contains all the details regarding the Patient.


Bed Movement Interface for Individual Hospitals
- Individual Hospital facility management staff or hospital admin can move a vacant bed from one wardroom to another wardroom. They can move bed in wardroom located at same floor and block or wardroom located at any different floor or block of its Hospital.
- User who have read only view can not see Bed Movement submenu inside Bed menu.
- If required, Individual Hospital facility management staff can edit bed-code before moving that bed to another wardroom.
- Note: Bed Movement is strictly allowed to move bed only in same hospital, it is not allowed to move bed from one hospital to another hospital.


Healthbyte Technology Private Limited
603, 6th Floor, Gold Crest Business Park, LBS Marg, Behind Kailash Esplanade, Opposite Vijay Sales (Helix 3 Mall), Ghatkopar (W), Mumbai 400086
E-mail: contact@healthbyte.in
